Adapted from Cuisinart’s Mexican Style Chocolate Ice Cream
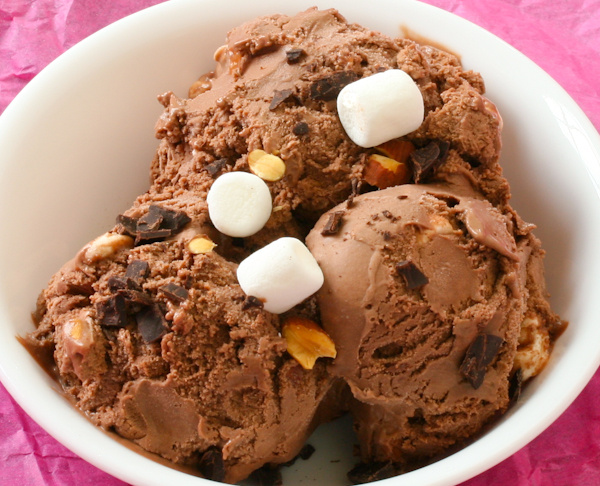
My dad, my husband and my father-in-law all love Rocky Road ice cream! Growing up on Guam, I remember my family often had the traditional Rocky Road with pieces of marshmallows and almonds. I added the extra chocolate chunks to somewhat mimic the Rocky Road that has chocolate covered almonds. This is such a delicious recipe!
Freeze your ice cream bowl for at least 24 hours. Ensure all of your ingredients are measured and your tools are readily at hand.
Makes about 4 ½ cups of ice cream.
INGREDIENTS
Set 1
2 c. whole milk
1 ½ c. heavy cream
1/3 c. sugar
1 tsp. vanilla extract
Pinch of salt
Set 2
5 large egg yolks
1/3 c. granulated sugar
Set 3
7 oz. Dove dark chocolate, finely chopped
1 T. chocolate or coffee liquor
Set 4
¼ c. chopped marshmallows
¼ c. chopped, roasted, unsalted almonds
2 squares of roughly chopped Dove dark chocolate
Tools: ice cream maker with frozen bowl, medium pot, 2 rubber spatulas, 2 whisks, trivet, 3 medium, stainless steel or glass bowls, 1 very large bowl, wooden spoon, fine mesh strainer, ice cubes, a 4 to 5-cup freezer-safe container with a lid or 2, 2-cup containers with covers
DIRECTIONS
1. Place the strainer atop one medium bowl and set aside. Place the finely chopped chocolate into the second medium bowl and set aside. Ensure your very large bowl is ready for use and set aside. Place a trivet on the counter near your stove.
2. Pour the milk, heavy cream, 1/3 cup sugar, vanilla extract, and a pinch of salt into the medium pot. Place on medium-low to medium heat and heat the dairy just until it boils. Stir occasionally.
3. While waiting for the liquids to come to a boil go ahead and prepare the egg and sugar mixture. In the third medium bowl, combine the egg yolks and 1/3 cup of sugar. Use a hand whisk to beat together until the mixture turns a pale yellow. Use a rubber spatula to clean off the rims of the bowl, scraping the residue back into the mixture.
4. Once the heated dairy is ready, stir the egg mixture to loosen it up. Slowly whisk in about a 1/3 cup of the hot mixture to the egg mixture. Continue to add the hot dairy to the egg mixture until there is about 1/3 of the hot dairy left in the pot.
5. Pour the tempered eggs and dairy back into the pot.
6. Place the pot back on the stove over medium-low heat.
7. You do not want this to come to a boil. Instead, heat this mixture just until it coats the back of a wooden spoon. Run your finger through the coated spoon. It is hot enough when your finger leaves a trail on the spoon.
8. Pour the mixture into the strainer set atop the medium bowl.
9. Add the liquor to the chopped chocolate.
10. Pour the strained mixture over the chopped chocolate.
11. Use a whisk to thoroughly incorporate the new mixture.
12. Make an ice bath by pouring some ice cubes into the very large bowl. Add a little bit of water. Position the bowl of your ice cream mixture gently into the ice bath so that it is fairly stable.
13. Use a rubber spatula to stir the mixture, cooling it. Once it is cool to the touch, carefully carry this contraption and place it in the fridge for about 1 hour. Stir occasionally.
14. Once the mixture is cold and thick, remove the entire contraption from the fridge. Remove the bowl of ice cream mixture and wipe the bottom of it until it is entirely dry.
15. Assemble your ice cream maker according to the manufacturer’s directions and prepare it for the ice cream mixture.
16. Pour the mixture into the rotating bowl. Once the mixture is semi-frozen and coming up to the rim of the bowl, add the marshmallows, nuts, and chocolate pieces.
17. Once the ice cream is done, pour into freezable containers for several hours until it has hardened.
Effective March 2021, PaulaQ will begin replacing Canola and vegetable/seed oils in recipes with pure lard from Reverence Farm, coconut oil, and avocado oil.