ROSKU
 PRINT PDF
The recipe is below, I promise.
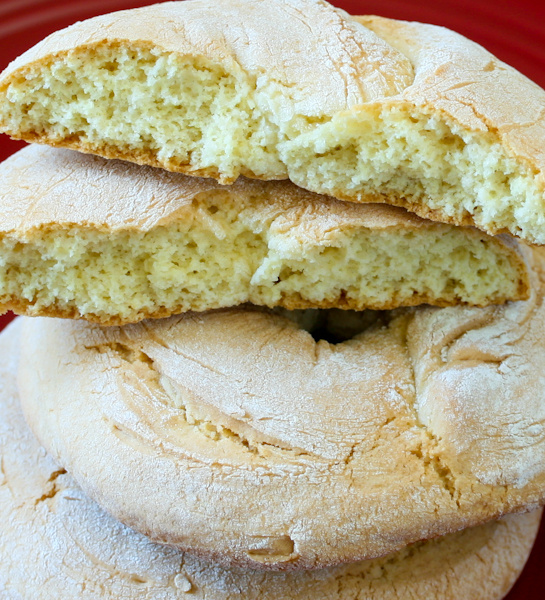
When I first learned of rosku, I was puzzled because I never, ever had it on Guam. And believe me, if it was sweet and if it was around from the 1970s to the 1990s, I would have tried it at least once. So far as I can tell, from my best friend Mel Quintanilla, and a handful of other friends, rosku is not available on Guam….unless a relative from Saipan hand-carried them or mailed them over. Mel describes rosku as “almost like an American scone…..it’s as big as the plate for a coffee cup and a cross between a cookie and a cake.” Mel’s mom is from Saipan and her dad is from Guam. She was always going back and forth between the islands when we were in high school. Fortunately, Mel just sent me some rosku from Saipan (August 2012). Even though I likely got them about three weeks after they were baked, I loved it!!
I can see how easy it would be for folks to confuse rosku with pan-tosta: both are generally round, both are best dipped in coffee and both look very much alike. I love several things about rosku: (1) if you dip it into very hot coffee, it doesn’t burn your mouth like pan-tosta…in-fact, it has to be very hot coffee for the ultimate experience, (2) it’s sweeter than pan-tosta, (3) it does not fall into the coffee as quickly as pan-tosta does, and finally, (4) it is soooo much easier to make!
My preoccupation with rosku began on Saipan (670) Chamorro Recipes Facebook group. The idea of something else to dip in coffee was irresistible……and why I never heard about it on Guam.
This rosku recipe is actually inspired by the recipe on Saipan (670) by A.C. I halved the original recipe because I did not want to make too much. However, I couldn’t add all the milk because it would have otherwise been too wet, almost like a batter. Keep in mind that with some recipes, you really need to be standing right next to the baker to get hands-on experience and a first-hand look. I also added extra baking powder, an egg yolk and a bit of vanilla.
The recipe below is my third attempt and I think I’ve got a winner. This recipe is different from the other recipes I have on my website because I really have no history with it and it is difficult to make comparisons. So, if you are from Saipan, please let me know how this is. I find that it is close to the ones Mel sent me, but……I still like the bakery’s better….it was from Dandan Bakery.
I prefer this rosku the day after it is baked. It’s okay by itself, but it is too darn good with coffee! I’ll get a video done soon.
from a fan: "My wife made a batch of Rosku on Saturday, turned out great, Thanks for the recipe."
INGREDIENTS
Set 1
4 c. flour
½ tsp. salt
5 tsp. baking powder
Set 2
4 whole eggs + 1 egg yolk, room temperature
2 c. + 2 tablespoons granulated sugar
3 T. white Crisco
1 T. butter Crisco
½ tsp. vanilla extract
Set 3
3 T. evaporated milk
Extra flour for sprinkling and dusting
Tools: large bowl, medium bowl, electric beater, ¼-cup measuring cup, ½-cup measuring cup, cookie sheets, non-stick baking paper, small measuring cup of water, bowl scraper or rubber spatula
DIRECTIONS
Preheat the oven to 375 degrees Fahrenheit. The oven must be at 375 for at least 15 minutes prior to baking your first tray of rosku.
Mix the dough
1. Combine the flour, salt and baking powder in a large bowl. Mix this well then set aside.
2. Place the eggs, sugar, white Crisco, butter Crisco and vanilla extract into the medium bowl. Beat thoroughly with the electric beater to completely incorporate all of the fats and sugar.
3. Pour the creamed ingredients into the dry mixture and mix with one hand till it is well combined. The dough will be sticky.
4. Add the evaporated milk. It will be more sticky…a very soft, sticky dough compared to dough for pan-tosta. It should still look like very, very soft dough…..but not like pancake batter. If you lift the dough and squeeze some back into the bowl, it should not disappear into the rest of the dough.
5. Scrape the sides of the bowl with a bowl scraper or stiff rubber spatula or your hand.
6. Wash and dry your hands.
Roll the dough
7. Line all of your cookie sheets with non-stick parchment.
8. Fill the ½-cup measuring cup halfway with water and set aside near your rolling area.
9. Flour your rolling surface with plenty of flour.
10. Use the ¼-cup measuring cup to portion out the dough. Fill the cup about three-quarters full.
11. Flour one index finger then use it to remove the dough from the measuring cup, directly onto the floured board.
12. Sprinkle more flour over the dough.
13. Pick the dough up and toss it back and forth between your hands as if you were tossing a baseball, squeezing the dough to knead it; your hands should only be about 4 inches apart.
14. Once the dough begins to feel tacky, put it back on the board and sprinkle more flour on the dough; be generous. Repeat the back-and-forth tossing once more until the dough becomes slightly tacky again. The point of this is to add more flour and build up the gluten just a bit so the rosku holds its shape in the oven. If the dough is too soft, it will rise then flatten out.
15. Flour your rolling surface again.
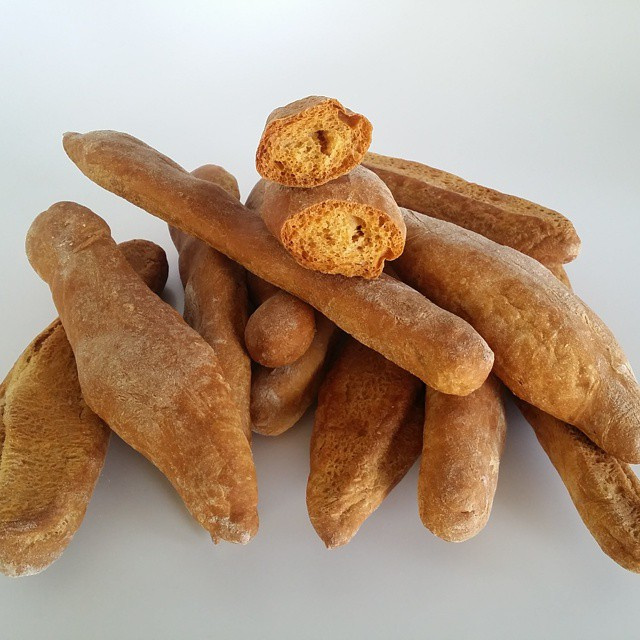
16. Start rolling the dough with one hand then introduce your second hand. Roll it into a log about 7 to 8 inches long and a thickness between the diameter of a nickel and the diameter of a penny. The thinner your log, the skinnier your rosku will be and the faster it will cook. I rolled mine thick so my roskus were huge J. Don’t make the log too long or it will be difficult to transfer to a baking sheet; if this happens, turn it back into a ball of dough then reshape.
17. Draw the two ends together into a circle without letting the ends touch. Set the ends down on the board.
18. Use your other index or middle finger to wet the top of one end of the log, only about a half-inch from the end itself.
19. Lay the other, dry end over the wet end. Press gently.
20. Carefully transfer to a cookie sheet, cuddling the ring in both hands. These treats will expand so leave plenty of space between them. I bake 4 at a time on the normal sized sheets; 6 at a time on the very large sheets.
Bake em’ up baby
21. Bake for 17 to 18 minutes. The rosku will be light brown on top and should feel firm to the touch.
22. These will come out softer than a cake but more dense than a cookie.
23. Let sit on sheets for 3 to 5 minutes then cool completely on a wire rack.
24. Store in a freezer Ziploc bag.
 You May Also Like Pan Tosta
 Return to More Recipes
 Next Recipe